tech
November 30, 2018
2020 Toyota Corolla Hybrid aims for 50 mpg combined - Roadshow
Toyota says it's the most efficient Corolla ever.
from CNET News https://ift.tt/2Q0sX1G
from CNET News https://ift.tt/2Q0sX1G


For those of us who celebrate Christmas, the next few weeks are set to be the busiest time of the year. We all run around buying gifts, sending greetings cards, meeting up with friends and family, and generally being rushed off our feet for no apparent reason.
However, Google thinks its Assistant can help you survive the holidays. And it has rolled out a bunch of new features designed to do just that. Some of Google Assistant’s new features are only loosely connected with the holidays, but we’ll let them off.
Google revealed Assistant’s new holiday-related features in a post on The Keyword. And they are as follows…
Google Assistant now recognizes when you say “please” and “thank you”. The feature, called Pretty Please, rewards politeness by having Assistant reply in an equally polite manner.
Google Assistant can now help you keep track of gift ideas by using notes and lists. You can create a gift list, add ideas to an existing list, and more besides, all with your voice.
Google Assistant now lets you call Santa, and he needs your help while rehearsing for a concert. If you have a Smart Display you can even see some album covers for bands from the North Pole.
Pretty Please encourages good manners for everyone. Say “please” or “thank you” when using your Google Assistant and listen for an equally pleasing response. https://t.co/7MYbFyWc1H pic.twitter.com/NQ3AZrVX9W
— Made by Google (@madebygoogle) November 29, 2018
If you have a Smart Display and a Google Play Music subscription you can now sing along to your favorite songs. Unfortunately, synchronized lyrics are only available for selected songs.
You can also have Google Assistant read along to one of your favorite Christmas stories. The titles listed here will have music and sound effects added. Alternatively, you can just say, “Hey Google, tell me a story” to have one of 50 titles read to you.
If you’re new to Google Assistant, check out our guide explaining how to use Google Assistant. And if you’re unsure whether Google Assistant is really better than its competitors, we’ve pitched Google Assistant vs. Siri and Google Assistant vs. Cortana.
Read the full article: Google Assistant Gets New Features for the Holidays

Fortnite has proved to be a massive hit. Since its release in 2017 it has grown into a worldwide phenomenon. It’s one of the best cross-play games available, and you can even play Fortnite on Android or iOS. Unfortunately, there’s a downside to all of this…
According to Bloomberg, parents are sending their kids to rehab for video game addiction. And most of the kids attending rehab for video game addiction play Fortnite to excess. While it isn’t the only game being played, it seems to be a particular problem.
Bloomberg cites one parent of a teenager whose grades have plummeted thanks to his Fortnite addiction. It also quotes Lorrine Marer, a British behavioral specialist, as claiming, “This game is like heroin. Once you are hooked, it’s hard to get unhooked”.
Apparently people are “addicted” to #Fortnite, and it’s causing divorces and bad grades. Makes me glad I already hate the game.
— Diddy (@somecrazyboii) November 28, 2018
It isn’t hard to see why Fortnite has captured the hearts and minds of children the world over. For starters it’s free-to-play, taking away the barrier to entry. And the desire to be the last man standing at the end of a battle royale means kids will keep coming back for more.
Video games aren’t just causing problems for children either. One survey suggests that video game addiction has been cited in 200 divorce petitions in the U.K. in 2018. Which suggests this seemingly harmless activity is literally ruining relationships.
It should be noted that the number of people addicted to Fortnite is a fraction of the overall userbase. Around 200 million people play Fortnite worldwide, and only a tiny fraction of them can be classified as being addicted to the point that it’s a problem.
Still, this isn’t the first time Fortnite has been accused of having a negative influence on kids. So at the very least parents should educate and inform themselves about the game. Which is why our parents’ guide to Fortnite is required reading.
Read the full article: Kids Are Attending Rehab for Fortnite Addiction

DJI, the company best known for its solid line of drones, has just released a really solid looking gimbal-stabilized camera called the Osmo Pocket.
The tiny camera is available for pre-order right now, and it’s scheduled to ship in December, so you won’t have to wait too long to get your hands on one.
The Osmo Pocket’s main selling point is its size. It barely tips the scale at only 116g, so you can carry it around extremely comfortably. It’s only 121.9mm tall, 28.6mm wide, and 36.9mm deep.
In spite of the tiny size, the camera is literally packed with features. First and foremost, it’s equipped with a 3-axis gimbal, which means it’ll create incredibly stable footage regardless of how much you or the subject is moving around.
The sensor on the camera is 1/2.3″.
One of the most impressive things about this camera is its ability to capture 4K footage at 60fps. If you want silky smooth videos at high resolution, the Osmo Pocket will most certainly handle it.
Preorder your #DJI #OsmoPocket today for $349 at https://t.co/XZ72IDgTl9 #BecauseLifeIsBig pic.twitter.com/VPnnnWFpSX
— DJI (@DJIGlobal) November 28, 2018
As for battery life, the Osmo Pocket promises to last about 140 minutes, but of course, your mileage may vary when it comes to how long it’ll last.
Here are some other important things to point out about the new camera:
The Osmo Pocket 3-Axis Stabilized handheld 4K camera is available for pre-order directly from DJI for $350. Best Buy also has it for the same price. Unfortunately for Amazon shoppers, the Pocket isn’t listed on there as of this writing.
If you decide to snag one to create some awesome movies, make sure to check out our guide to creating more cinematic videos, which will help you create cooler footage than you ever imagined.
Read the full article: DJI Announces the Osmo Pocket: A 3-Axis Stabilized Handheld 4K Camera

You may have seen a timeline of a friend’s journey on Facebook over the years and thought that was a particularly attractive and striking way to condense information into a simple diagram. But timelines are not limited only to Facebook users.
Whether you are a student or a professional, creating a timeline for your work can be critically important. It helps you keep track of your progress and helps you focus on completing future milestones until the work is done.
Here are some online tools that let you create excellent timelines for your projects.

This is an award-winning project scheduler with excellent timeline making options. It’s a great favorite among working professionals because of great graphics options that make for catchy presentations.
Pros:
Cons:
Subscribe: Office Timeline (Free, $59 for 1-year license)

A popular choice among students and teachers, Preceden allows you to create parallel timelines and accompanying charts. Multiple unique timelines can be created by adding layers to the initial timeline.
Pros:
Cons:
Subscribe: Preceden (Free for students, $29 for professionals)

Yet another favorite among teachers and students, Sutori breaks from the tradition of other timeline makers. It shares information through interactive timelines and stories using an engaging narrative structure. You can choose from pre-made stories or make up your own.
Pros:
Cons:
Subscribe: Sutori (Free, $49 for 1-year license)

This is a web service dedicated to creating timelines that can span centuries or seconds. It is mostly used to create timelines of historical events that can be viewed by other users.
Pros:
Cons:
Subscribe: Timeglider (Free, $5/mo for premium features)

A diagramming software that provides hundreds of pre-selected templates and diagrams for automatic formatting. You can create any type of timeline that includes process maps, flowcharts, schedules, mockups etc.
Pros:
Cons:
Subscribe: SmartDraw ($10/mo for a single user)

A team management software which lets you create and manage the tasks of multiple people on your team spread across a timeline. The team members can view the progress of their teammates as with a timesheet.
Pros:
Cons:
Subscribe: Teamweek (Free up to 5 members, $35/mo for larger teams)

A free online service used mostly for business and academic presentations. It uses the privacy principles of Facebook and YouTube videos, which means you can make your timeline private, accessible by link or public.
Pros:
Cons:
Subscribe: Time Graphics (Free, $14/mo for premium features)
Creating a timeline is an invaluable way to make sure you stay on track. Especially if you’re working in a group. The details of your project might vary. It can be a piece of homework, a presentation or a workplace project. But putting the details on a timeline will be a constant reminder of how far you’ve progressed, and how far you still have left to go.
After all, boosting your workplace efficiency is a constant battle. The kind of visual reminder offered by a timeline is of great use in the fight against procrastination that every student and working professional faces at some point. It helps you stick to a plan and tackle your work bit by bit, piece by piece until you finally master it.
Read the full article: 7 Nifty Tools You Can Use to Create Project Timelines

The last thing you want is for your MacBook’s battery to die when you need it most. While Mac laptops do offer solid battery life compared to many competitors, even the best batteries decline with age. Batteries are consumable, but you can enhance their overall longevity through regular monitoring and housekeeping.
We’re going to introduce you to a handful of battery managing tools. These will help you squeeze the most out of your Mac’s battery.

Battery Health is arguably the most popular battery monitoring tool for macOS, and Battery Health 2 is its successor. This tool offers a neat interface that lists all the battery vitals.
The app displays the Current Charge, Current Max, macOS Health Status, Cycles, Age, Power Usage and Amperage. The Battery Remaining feature is great, especially since Apple decided to do away with a similar native feature in the recent past.
Power History is a premium feature that helps you gain useful insights. It displays dynamic power consumption graphs and beam notifications when the battery consumption exceeds a certain threshold.
Download: Battery Health 2 (Free, premium version available)

Coconut Battery is another stalwart of macOS battery monitoring tools that focuses on the basics. Despite its spartan approach, the app is accurate and useful.
Coconut Battery displays a percentage bar showing your current full charge capacity followed by a percentage bar for the battery’s designed capacity. The app also lets you record battery status at different intervals of time and save the log accordingly. Lastly, the tool also lets you check the battery status of your iOS device if it’s connected to your Mac via USB or Wi-Fi.
Download: Coconut Battery (Free, premium version available)

iStat Menus comes in handy if you want to add advanced stats like Fan Speed, Memory Consumption, and Network Indicators. Apart from this, iStat Menu also offers an insightful battery monitoring tool that helps you keep abreast with the battery vitals. The tool displays Battery Health, Cycles, and Condition.
iStat Menus displays the Time Remaining on your current charge, along with a list of apps that are hogging resources. Hovering your mouse on each of these options will lead you to advanced stats to help better deduce the battery’s condition. Make sure you’ve put our tips for better MacBook battery life to use, too.
Download: iStat Menus Free Trial | iStat Menus ($10)

Chargeberry is a comprehensive battery monitor for Mac. Unlike other apps, Chargeberry emphasizes maintaining your MacBook battery. After using it for a couple of days, the user interface grew on me. Chargeberry offers battery monitoring essentials like Capacity, Factory Capacity, Cycles Used, Temperature, and Age.
As far as novelties, Chargeberry offers a live energy consumption graph. This segregates your Mac’s battery usage into different categories like internet Browsing, Music, Movies, and Standby. The tool lets you toggle features like Time Remaining, and you can also set discharge notifications at custom percentages.
Chargeberry takes this a step further and will remind you to charge your battery once it hits 40 percent, a practice that considered to prolong overall battery life. Lastly, the History section of the app displays your Mac’s power consumption across different days, weeks, and months. The app also displays Top Energy-Consuming Apps.
Download: Chargeberry Battery Monitor (Free)

Like Chargeberry, the FruitJuice app focuses on battery monitoring and maintenance. It runs a maintenance cycle the first time you fire it up. This mode keeps the discharge within the optimum range of 100 to 20 percent. The app also features a comprehensive Power History feature that plots your battery statistics up to a maximum of 365 days.
What I like most about the FruitJuice app is that it’s completely automated. The app walks you through every step and offers guidance as to when you should plug your laptop or run it on battery. The Maintenance Cycle is run in regular intervals and with every new cycle, the app decides if there’s a need to change the discharge cycle range.
Download: FruitJuice Demo | FruitJuice Battery App ($10)

Endurance is a more active battery management tool that aims to help Mac users increase their battery life. It switches your Mac into a low-power mode as soon as the battery level falls below a certain percentage. The tool saves power by Dimming the screen, Monitoring Expensive Apps, Monitoring Flash Plugin, Slowing Down Processor, and Hiding Background Apps.
You can choose the trigger levels at which you want Endurance mode to kick in. I’ve observed a substantial increase in battery life after using this mode. In essence, the app lets you easily decide between performance and battery life. It’s an app Apple should have preloaded in macOS.
Download: Endurance (Free trial, $20)

Apple has been thoughtful enough to include a battery cycle tool in macOS. The tool is not as comprehensive as those above; however, it does offer basic functionalities. In order to access the built-in battery information tool, follow these steps:
The Battery Information heading displays Cycle Count, Condition, Charge Remaining, and Battery Voltage. Ideally, a MacBook Air battery should last for a thousand charge cycles. Earlier models had a lower maximum cycle count, however. Check out the Apple Support battery cycle page for details about all MacBook models.
While you can get away with a worn-out battery for a bit, you’ll likely have to replace your laptop battery eventually. Old batteries could lead to your Mac shutting down at random.
Unfortunately, modern MacBooks don’t make it easy to replace the battery on your own. We’ve compared your MacBook replacement battery options to help you get the best support.
Read the full article: 6 Apps to Monitor and Improve Your MacBook’s Battery Life

You’re working on an assignment, surfing the web, or doing some other important task. Suddenly, your Mac shuts down randomly—and apparently, for no reason. Usually, this is just a one-time occurrence and never happens again.
But if you’re dealing with a computer that habitually shuts down with no warning, you may have bigger issues. Here are some troubleshooting tips and tools to help fix your Mac.
When you experience a random Mac shutdown, the first and most important step is to boot it back up, then immediately restart it again. Doing this is necessary because programs don’t always close correctly during a hard shutdown.
To restart again, select Restart from the Apple menu in the top-left corner. Unfortunately, just rebooting your Mac might not solve the problem. In this case, Apple recommends resetting the computer’s System Management Controller (SMC).
The SMC is a subsystem of Macs with an Intel processor. It controls components like the battery charging, video mode switching, sleep and wake, LED indicators, and more.
Before resetting the SMC, Apple recommends taking the following steps, in the order they are listed:
Once you’ve exhausted these steps, it’s time to reset your Mac’s SMC. The steps involved vary, depending on whether your system has a removable battery. MacBooks that have a non-removable battery include any MacBook Pro from 2009 and later, every MacBook Air, MacBook (Late 2009), and the 12-inch MacBook from 2015 and later.
There’s also a separate set of steps for any MacBook with an Apple T2 security chip. These are typically computers from 2018 and later.
If the battery is non-removable:
If the battery is removable, do the following:
On an iMac, Mac mini, or Mac Pro:
For any Mac notebook with the T2 chip:
Macs last for a long time, but they can develop problems with age. Thankfully, you can take some steps to make sure your Mac continues to run smoothly. At the least, you can know before trouble hits.

Rechargeable batteries don’t last forever. Usage of your MacBook battery accrues in the form of charge cycles. Each battery is only good for a limited number of charge cycles. At that point, the battery is consumed and you’ll need to replace it.
You can view a Mac’s current battery cycle count by heading to the Apple menu and selecting About This Mac. Select System Report and then navigate to the Power subsection under Hardware. Under Battery Information, you’ll see the current Cycle Count.
The maximum cycle count varies by model. Some early MacBooks only offered 300 cycle counts, while newer models usually last for up to 1,000 cycle counts. A charge cycle means using all the battery’s power, not necessarily a single charge. For example, discharging from 100 to 50 percent battery, then charging back to 100 percent before discharging to 50 percent again, counts as one cycle.
When your battery has reached its maximum cycle count, it’s time for a replacement.
When your Mac is experiencing issues, there are many free third-party tools for Mac that help guide you in the right direction.
A great choice when you’re looking to find out more about a Mac’s battery is Battery Health. The app goes beyond cycle counts and explains information in less technical terms so you can track battery temperature, status, design capacity, and more. The app also shows how much longer your battery will last on its current charge for various activities.
Checking your battery’s temperature is also important. A battery that frequently overheats suggests bigger issues.

The less you need to charge your battery, the longer the battery should last and the healthier your computer will remain. Thus, apps that are consistent battery hogs can cause long-term damage to your investment.
The easiest way to see what apps are using the most battery life on your MacBook is to select the battery icon in the menu bar on the upper-right corner of the screen. Here you can see apps Using Significant Energy.
You should also use your Mac’s Activity Monitor, which shows you the apps and services that are using up the most CPU power. Go to Applications > Utilities > Activity Monitor to open it. Pay careful attention to the items located under the CPU and Energy tabs, as large numbers here could be troublesome.
You should also check your computer’s Energy Saver settings, which are located in the System Preferences menu. For most users, the default settings are appropriate. Click Restore Defaults for those settings.
You should calibrate the battery on an older Mac once a month. According to Apple, any MacBook model released after mid-2009 is pre-calibrated and doesn’t require calibration.
Keeping your MacBook battery properly calibrated is the best way to keep an eye on how much power your machine has left before shutting down. If a battery isn’t properly calibrated, a laptop could shut down or go to sleep without warning. When calibration is complete, you’ll get a more accurate picture of how much battery power actually remains.
To help lengthen the life of your laptop, check out these tips to improve MacBook battery life.
If your Mac keeps shutting down randomly even after using the troubleshooting tools mentioned above, it’s time to visit an Apple retail store, or an approved service center. You can also contact the company through Apple Support.
For any Mac not currently under warranty, another option to consider is a third-party repair center. These can often fix the issue for much less than going directly through Apple.
If the cause of your random shutdowns is the battery, make sure to take a look at your options to replace a MacBook battery.
Read the full article: Mac Shutting Down Randomly? Here’s What You Can Do
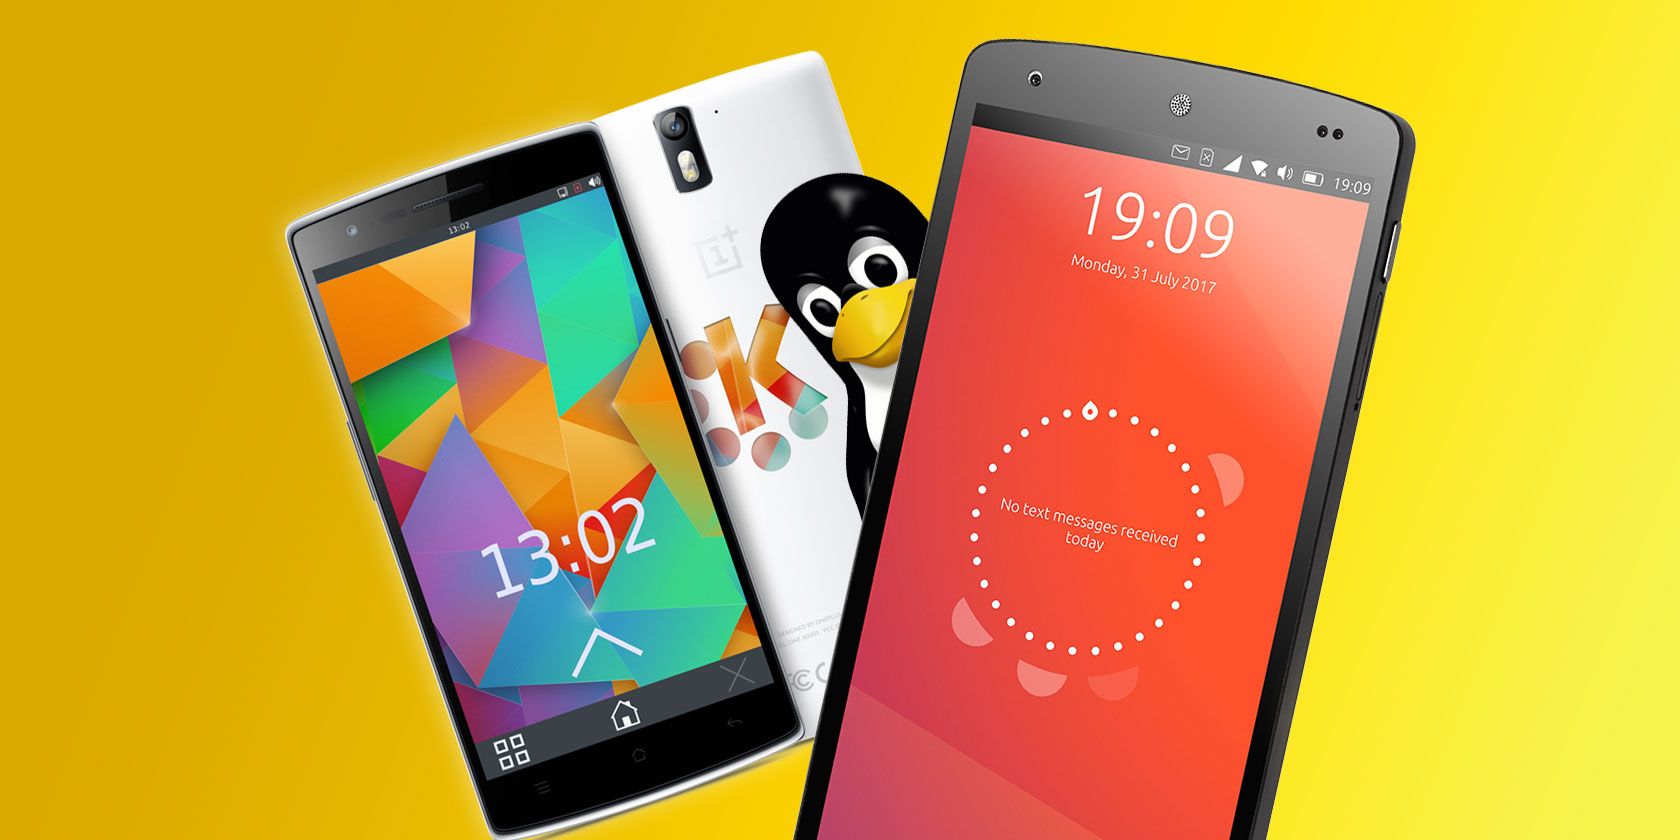
Sick of Android? Don’t want to be part of a proprietary ecosystem? Security and privacy are becoming increasingly important for smartphone users, but what is the answer?
Is it possible to abandon Android and iOS for another mobile operating system?
When you want an alternative operating system, Linux is usually the answer. But what Linux smartphone operating systems are available to install today?
Originally released by Ubuntu developers Canonical, Ubuntu Touch is currently being maintained by UBports. This means that Ubuntu’s abandoned mobile operating system lives on.
Ubuntu Touch’s approach to smartphones is intelligent, dealing with the lack of apps by providing social, news, and photo tools natively. This is done in the guise of Scopes, different pages of the Home screen that provide customized news, weather, apps, and social networks.
It works well, too, although there is always a time when apps are needed.
Perhaps Ubuntu Touch’s greatest strength, however, is Convergence.
This is a system, much like Microsoft’s Continuum and Samsung DeX, in which the mobile device is connected to a wireless HDMI device, keyboard, and mouse, and used as a desktop computer. The only real difference between this and your desktop Linux device is that the phone has an ARM processor.
Currently supported devices include the handsets where Ubuntu Touch came pre-installed, along with the OnePlus One, Fairphone 2, and Nexus 5 (Hammerhead). Many more are in active development, such as the OnePlus 2 and OnePlus 3.
Jointly developed by Jolla, Mer (a middleware stack developer), the Sailfish Alliance (a group of corporations) and community members, Sailfish OS is a continuation of abandoned operating system MeeGo, itself based on Maemo and Moblin.
The latest version of Sailfish OS is known as Sailfish X, which runs on Sony Xperia X devices. Unfortunately, Sailfish OS is not open source, and the free version is a time-limited trial.
The full version of Sailfish X will set you back around $50, and it’s only available within the European Union, Norway, and Switzerland. As noted on the website:
“…the use of our website and services to purchase Sailfish X outside of the Authorized Countries is prohibited.”
Sailfish OS has Android app support, so if that appeals, this OS is worth trying out.
Perhaps the most exciting option on the table is Plasma Mobile, a smartphone-focused spin on the popular Plasma, the latter deemed one of the best Linux desktop environments.
Having gained a lot of attention during 2017 (mostly due to Ubuntu abandoning Ubuntu Touch), Plasma Mobile’s aim is to become a “complete and open software system for mobile devices.”
Currently compatible with the Nexus 5 (Hammerhead) and OnePlus One, Plasma Mobile (based on Kubuntu) is also available for Intel-based PCs and tablets, thanks to an Arch Linux-based version.
There’s also multiROM support for the Nexus 5 (Hammerhead), enabling you to run Plasma Mobile alongside your preferred custom Android ROM.
Perhaps the best thing about the Plasma Mobile project is that you’re able to run desktop Plasma apps and widgets, as well as Ubuntu Touch apps. This gives the project a wider selection of apps than Ubuntu Touch.
As of this writing, three other notable Linux mobile projects are underway:
Intended as a system to improve future Linux mobile projects, Halium’s aim is to “unify the Hardware Abstraction Layer for projects which run GNU/Linux on mobile devices with pre-installed Android.”
There’s also an intention to standardize other software and improve Linux access to audio, camera, GPS and other hardware.
As you may imagine, if successful, this will make it far easier to install Linux on smartphones.
A more complete project is coming in the shape of a mobile version of PureOS, the privacy and security-focused Linux distro from Purism.
Currently there is no way to download PureOS for mobile, but Purism’s first phone, the Librem 5, will be released in 2019. This will be the most secure and private mobile device yet, and much of this will rely on the PureOS operating system.
Describing itself as “a real Linux distribution on the phone” postmarketOS (pmOS) is a version of Alpine Linux for smartphones.
Currently in early development, the aim of pmOS is to create a sustainable mobile OS, one with long-term support.
A wide number of devices can run pmOS, including the Amazon Fire HDX, Google Nexus devices, and Samsung Galaxy phones and tablets.
At this early of pmOS development, however, few of these devices have a full set of features. However, in offering multiple desktop environments, the pmOS project looks well-placed to fulfill its aim of creating a long-term sustainable mobile operating system based on Linux.
If you’re desperate to have Linux in your pocket but don’t have any of the devices listed above, there are alternatives.
These enable you to run Linux (or give the appearance of running Linux) from the comfort of your Android device as an app. A rooted phone is necessary in most cases, but these are mostly offering emulation.
A tool that doesn’t require root, KBOX is described as “a project to create a miniature Linux distribution for non-rooted (i.e., unmodified) Android devices, providing a Linux-like console environment.”
As such, it features many command line utilities, but is unavailable in Google Play. Instead, you’ll have to visit the website to download and install the APK. Make sure you understand the pitfalls of installing apps from third party sites beyond Google Play before proceeding.
Download: KBOX (free)
Rather than a command line environment with some Linux tools, you may prefer something like Linux Deploy, from Google Play. Requiring both a terminal emulator and a VNC client to be installed—as well as a rooted phone—Linux Deploy enables you to choose from several different distros. These are installed in a disk image on your device storage.
Once installed, however, you’ll be able to access a Linux desktop environment on your phone or tablet.
Download: Linux Deploy (free)
In short, Linux is available for many smartphones already. But there’s a long way to go. Linux distros on mobile devices are rare but need your support.
If you have one of the devices mentioned or linked to above, please try out a compatible Linux mobile distro.
Spend a few days with it to see how it works out for you. Then let the project community concerned know how it went. Let them know what worked, and what didn’t.
If you can code, why not offer the benefit of your experience to one of the development projects? Better still, you could even start developing your own mobile version of Linux using the Halium project.
Have you tried a Linux mobile operating system? Found it too hard to install? Well, don’t worry too much, you can run Linux on any Android smartphone.
Read the full article: 3 Linux Smartphone Operating Systems You Can Install Today
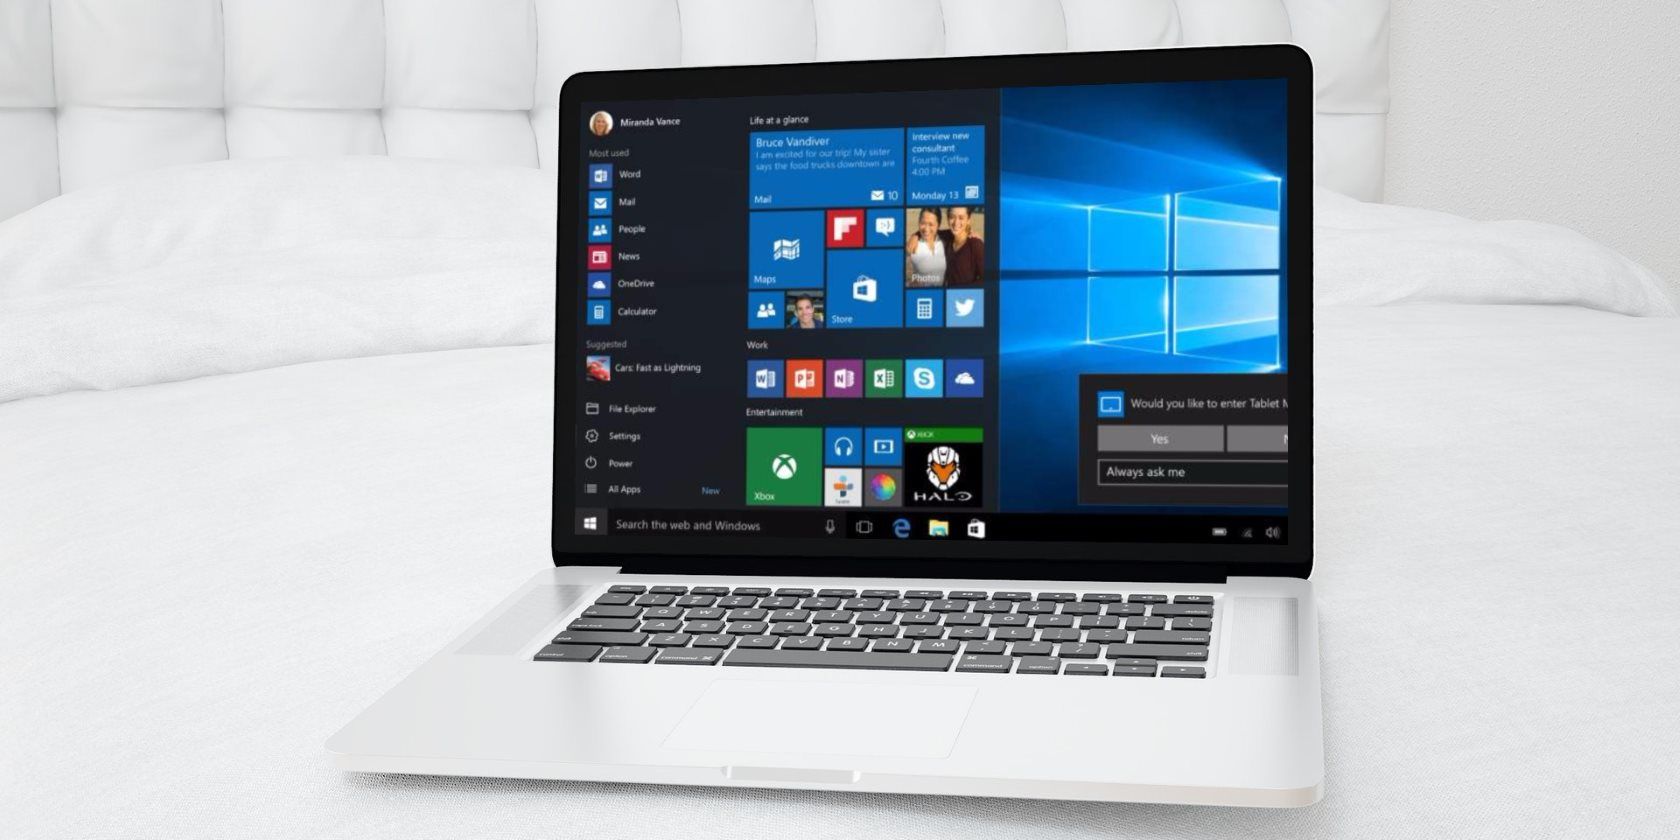
Installing Windows 10 on your Mac isn’t as straightforward as you might think. Boot Camp Assistant doesn’t work very well, particularly when it comes to creating bootable USB installation media.
Fortunately, help is at hand. You can create your own bootable USB installer, grab the drivers you need, and let macOS take care of the partitioning for you. Then it’s a case of sitting back and waiting for the installation to complete.
Boot Camp Assistant is Apple’s own dual-boot helper tool. It comes bundled with macOS, and is meant to help you create a bootable USB drive, download the necessary drivers, and re-partition your internal drive for use with Windows.
Due to the size of the latest Windows 10 disk images, this helper no longer works. Boot Camp Assistant formats your USB installation media to the FAT32 file system. The problem with FAT32 is that it can’t store files larger than 4GB.

The latest Windows 10 disk images are around 5GB in size, and contain a single install.wim file that clocks in over 4GB. Microsoft offers tutorials for splitting this file into multiple parts, but they require Windows. On a Mac, you’re out of luck.
If you try to create a regular USB installer using Boot Camp Assistant, you’ll receive an error telling you there’s not enough space on the disk. This is a confusing error that doesn’t make a lot of sense if, like me, you’re using a 32GB USB stick.
The solution is to create your own USB installer and ditch FAT32 entirely.
First, grab yourself a legitimate copy of Windows from Microsoft. You can download Windows 10 on Microsoft’s Software Download website. For security reasons, you should only ever download Windows from Microsoft.
You’ll also need Apple’s drivers for Windows. The downloads available on Apple’s own website are out of date, so download them using your Mac:

Now you’re ready to move on and create an installer. If this sounds like too much for you, check out other ways to run Windows apps on macOS without a full install.
Microsoft recommends an install medium of 5GB or larger. Some users recommend using an 8GB USB 2.0 drive. I used a 32GB USB 3.0 drive with no problem, but your mileage may vary.
Insert your USB drive and launch Disk Utility. Select your drive from the list on the left and click Erase (make sure there’s nothing on it you haven’t backed up). From the dropdown box, select exFAT as your file system. Give your USB drive a name like WININSTALL and click Erase.

Next, double-click the Windows ISO you downloaded to mount it. The image you mounted should open automatically (otherwise look in your Finder sidebar). Click and drag to select all the Windows 10 installation files, then copy them (Cmd + C).
Now paste those files onto the USB drive you just created (Cmd + V). Navigate to the drivers that you downloaded earlier. Copy the contents of the WindowsSupport folder to the root directory of your USB installer. Don’t just drag the WindowsSupport folder to the drive—copy the contents instead.

Your Windows 10 installation USB is now ready. If you run into issues, check out our Windows 10 installer troubleshooting guide.
With your USB drive still connected, launch Boot Camp Assistant again. Click Continue to begin the process, then uncheck Create a Windows 7 or later install disk and Download the latest Windows support software from Apple. You’ve already done both of these.

Leave Install Windows 7 or later version checked, then click Continue. On the next screen you’ll be asked to assign space to your Windows partition. Click and drag the slider (or click Divide Equally) to decide how this space is shared between your macOS and Windows partitions.

Click Continue when you’re ready to start the process, then input your administrator password. macOS will start partitioning your drive. Input your administrator password one more time, then your Mac will restart and begin the Windows installer.

If you receive an error about missing Windows support software, make sure you’ve copied the contents of the WindowsSupport folder you downloaded to the root of your USB drive. If folders like $WinPEDriver$ and BootCamp aren’t in the root USB folder, Boot Camp Assistant will refuse to repartition your drive.
Your Mac should restart and launch the Windows installer automatically. If it does not, or you canceled for some reason, you can restart the process:
Be patient while the installer loads. When prompted for a product key, you can click I don’t have a product key to install Windows 10 regardless. You’ll also need to select a version of Windows to install. Find out how to choose the right version of Windows 10 for you.
Eventually, you’ll need to specify where you want to install Windows. You should see a partition called BOOTCAMP in the list. Click on it, then click Format and proceed. Once you’ve formatted the partition, you should be able to click Next and continue installing Windows.
The installer will restart your Mac a few times while the installation takes place. Make a cup of coffee and sit back while it completes.
Eventually Windows 10 will restart and you’ll be asked for some more information, including your region and keyboard layout. It’s likely your wireless adapter won’t work with Windows natively, so when you’re prompted to connect to a network, click Skip for now.
Now create a user account, select a password, add a few security questions, and wait for Windows to finish configuring your desktop. After a few restarts, Windows will be ready for use. The first thing you should see is the Boot Camp installer.

Click Next followed by Install to begin the driver installation process. Its normal for your screen to flicker during this installation process. Once the drivers have installed, you’ll see a prompt to restart Windows.
By the time you’ve rebooted Windows, everything should work as expected. You’ll be able to connect to a wireless network, scroll with two fingers on the touchpad, use the media keys to adjust screen brightness, and so on.
Many Mac users buy Apple computers primarily because of the macOS user experience, but the convenience of having both Windows and macOS is undeniable. It’s a shame that Boot Camp Assistant doesn’t work quite like it should, but there’s almost always a workaround to any such issues.
Now that you’ve got Windows 10 up and running, why not check out some of the best Windows software to install right away?
Read the full article: How to Install Windows 10 on Mac: A Step-by-Step Guide

New York Times:
Sources say Sandberg asked Facebook staff to research George Soros's finances, though she denied knowledge of hiring Definers, the firm tasked to research Soros — Sheryl Sandberg asked Facebook's communications staff to research George Soros's financial interests in the wake …

Yogita Khatri / CoinDesk:
FBI arrests Jared Rice, Sr., CEO of cryptocurrency platform AriseBank, for defrauding investors out of $4M+ and charges him with securities and wire fraud — The FBI has arrested the CEO of cryptocurrency platform AriseBank after he was indicted over an alleged multi-million dollar scam.

James Titcomb / Telegraph:
Local reports say Apple has removed 700+ apps, including apps by Sogou and Pinduoduo, from the Chinese App Store for pushing app updates without Apple's review — Apple has removed hundreds of iPhone apps from its App Store in China, in the company's latest crackdown in one of its biggest markets.

Dan Thorp-Lancaster / Windows Central:
Intel to start distributing drivers for its graphics chips as Universal Windows Drivers, a single driver package that can run on different device types — Intel this week announced that, starting this month, it will begin distributing drivers for its products as “modern” Universal Windows Drivers (via Neowin).

Sarah Perez / TechCrunch:
A Nielsen report says US viewers spend nearly 8B hours per month streaming content via connected devices like Roku, Apple TV, and Amazon Fire TV — With the rise of streaming services and the trend toward cord cutting, the way U.S. consumers are watching video is also changing.

Wall Street Journal:
Indonesian ride-hailing company Go-Jek launches in Singapore, initially available to the customers of DBS bank, and plans a wider rollout by early 2019 — Less than a year after Uber's exit, a new challenger is taking on Grab — SINGAPORE—Indonesian technology firm PT Go-Jek Indonesia launched …

The Verge:
Alt-right commentator Laura Loomer handcuffed self to Twitter NYC door to protest her ban from the service; NYPD cut cuffs at Loomer's request after a few hours — 'They may have banned me from Twitter but now I'm handcuffed to Twitter' — Earlier this afternoon, alt-right Jewish commentator …

Liz Moyer / CNBC:
SEC settles with Floyd Mayweather and DJ Khaled on charges of promoting ICOs without disclosing payments; Mayweather to pay $600K+ in fees, Khaled to pay $150K+ — Pro boxer Floyd Mayweather and music producer DJ Khaled pumped up initial coin offerings without telling investors …

Nikhilesh De / CoinDesk:
Coinbase Pro says it is adding Zcash to its professional trading platform in the US, UK, European Union, Canada, Singapore, and Australia — Crypto exchange Coinbase Pro is adding privacy coin zcash to its listings. — The platform announced Thursday that customers can transfer zcash …
![]() Hello, my name is Srikanth. I'm interested in learning new things and sharing with everyone.
Hello, my name is Srikanth. I'm interested in learning new things and sharing with everyone.
Learn More →